
Standard Classroom Projector Trouble-Shooting Tips
These tips are just a few very simple solutions to typical projector issues that take place in a standard classroom setting, However – if you do not feel comfortable with troubleshooting technology we are always here to come fix the problem. The steps I will show you are exactly what I look at when I come into a room that is not displaying either the desired input or displaying an image at all.
(These steps assume that the projector is powered ON)
- The very first thing I do ,(because it’s the fastest fix), is to see if the lecterns PC’s screen is duplicated. To do this – simply hold the windows button on the keyboard and tap the letter P (This can be done at the log in screen as well as when already logged in). When you do this you will see this dialogue box appear:
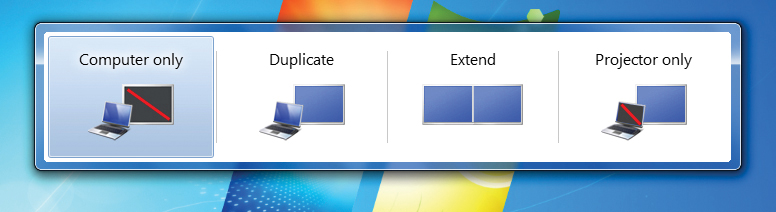
As you can see there are four options. Duplicate is the option we want. This is telling the PC to
send video to the monitor as well as the projector. Keep holding the windows key while taping the “P” key to cycle through the options.
2. My Second step is to check the input the projector is displaying. It is possible that the projector had been left on an input such as the document camera when the desired input is the Computer’s image. To cycle through inputs simply use the “SEARCH” button located in the source section of the projectors remote:
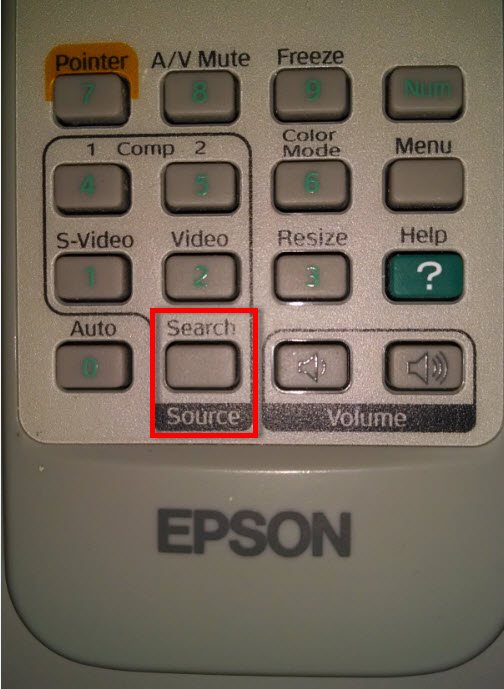
(There are many different types of projector remotes but all of them have a “SEARCH” source button.)
3. My Third step (if step one and two do not work) is to check physical connections. Each classroom has a wall plate that the computer, document camera, audio connectinos, and VCR/DVD player is connected too. It will be some variation of this Configuration:
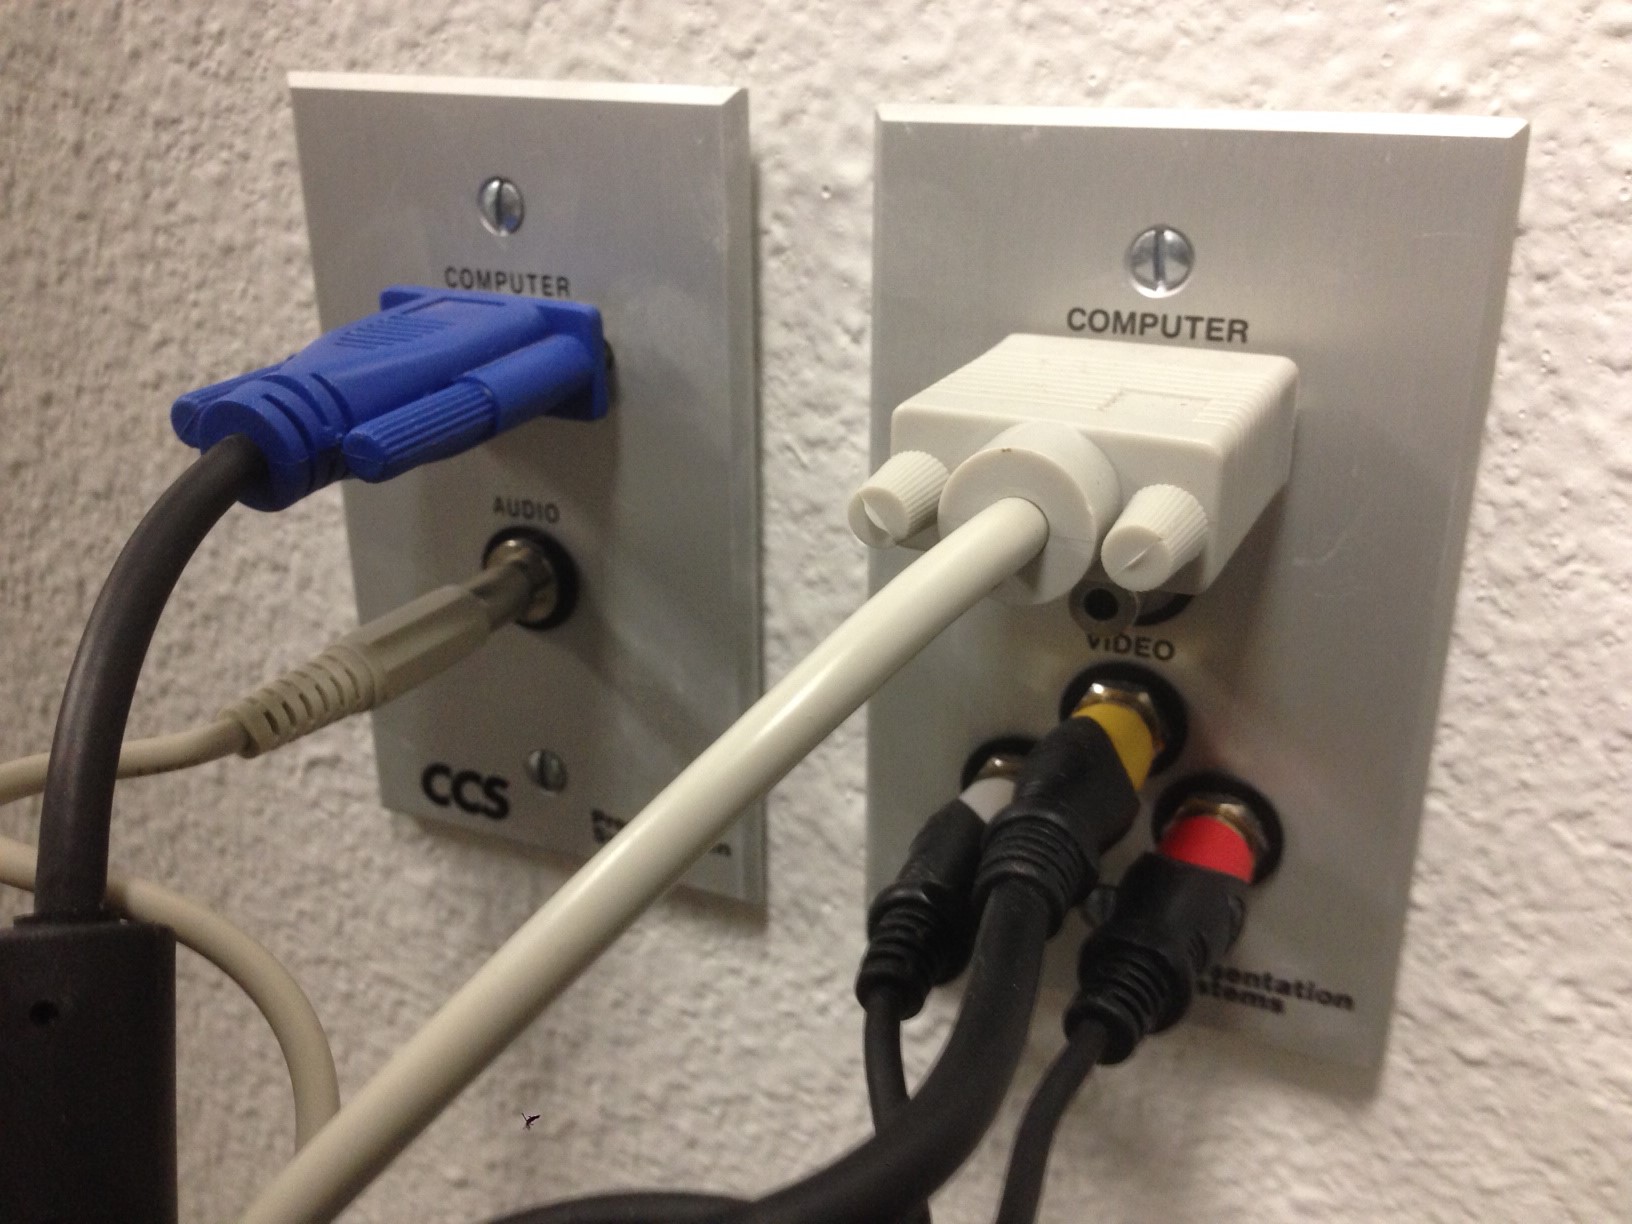
As you can see in this instance the VGA cable is connected to the plate labeled “Computer”. VGA cables are typically either blue, black, or white:
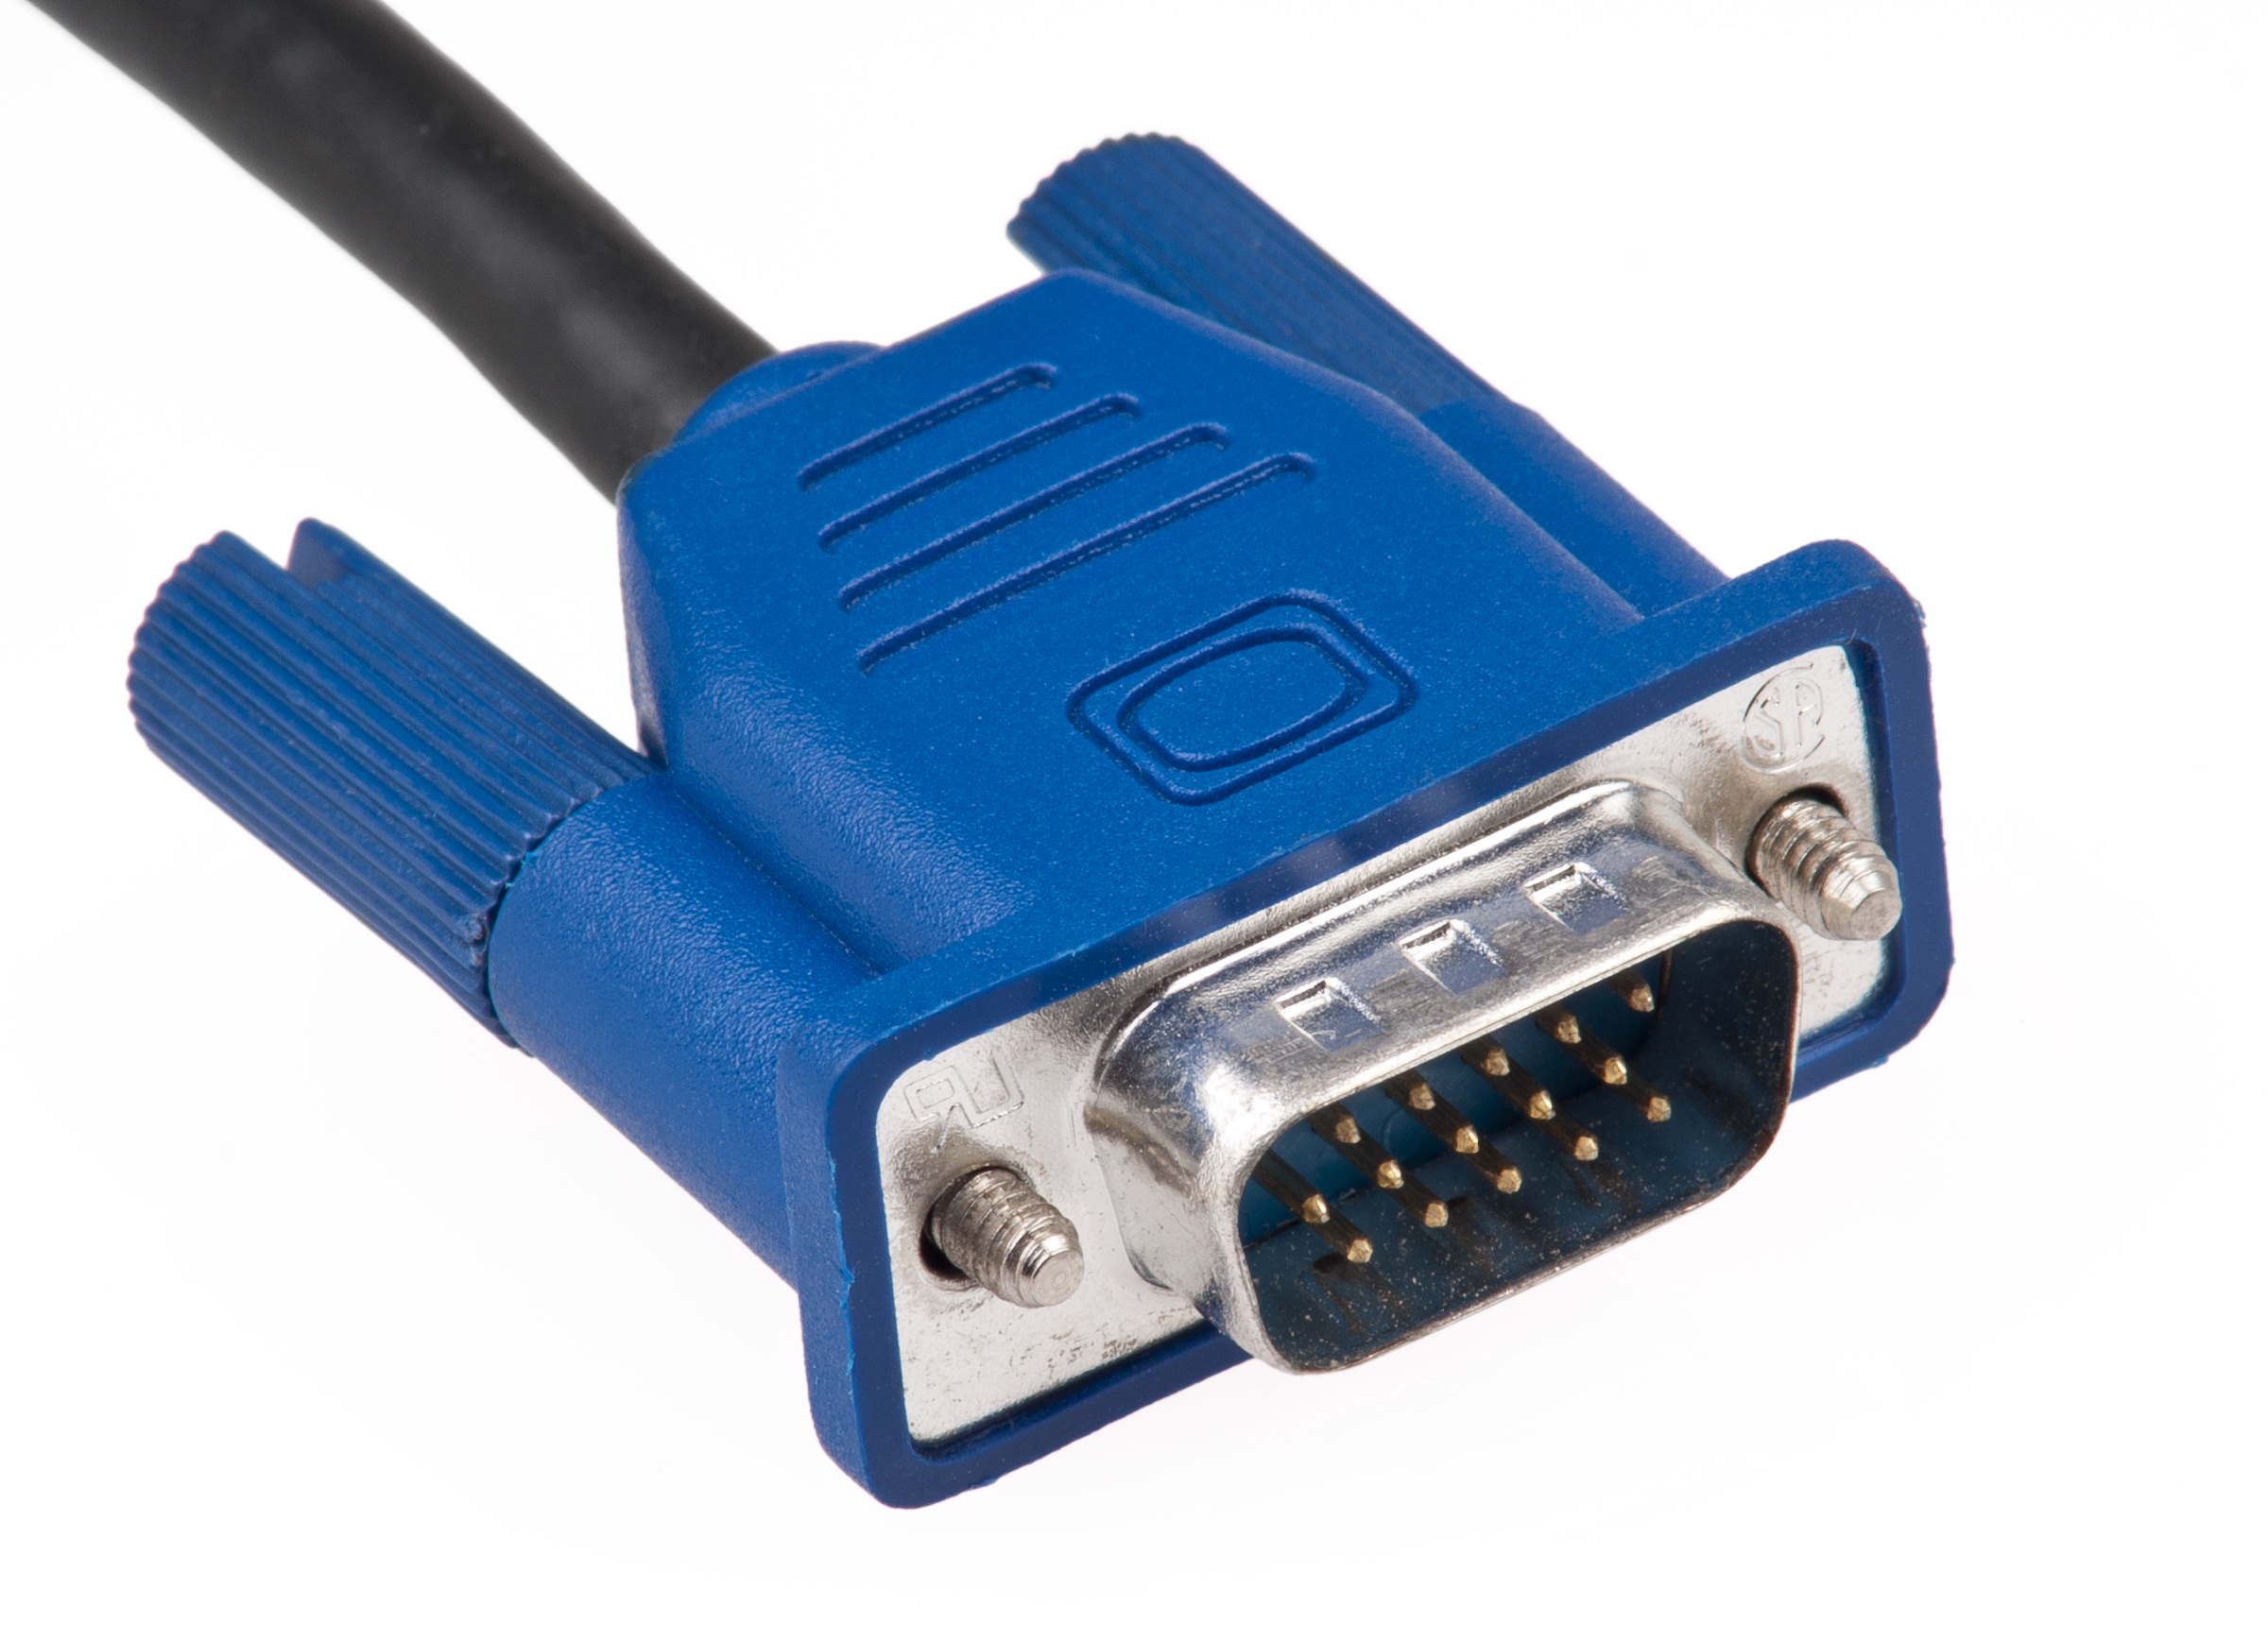
This cable carries the computer, laptop, or document cameras video signal. If the VGA cable is not plugged in to the wall plate it needs to be reconnected. To do this gently plug the cable into the socket, VGA cables only fit the socket one way so make sure the connector is the right side up. (Once connected – screw in the pins on either side of the cable to secure).
4. If the VGA cable is detached and you reconnect it properly you need to then go back through steps 1 and 2.
The situation of disconnected cables happens quite often, as a general best practice rule: If you need to unplug cables to connect your own personal devices please let us know so we can help accommodate as well as keep the room functioning as intended.
If the connection still fails, of course you can call the classroom technology specialist at 903-886-5511.
Recent Comments